Sidebar
en:intro:ui
This is an old revision of the document!
Table of Contents
User interface
The following figure illustrates the main elements of the SchoolDrive user interface:
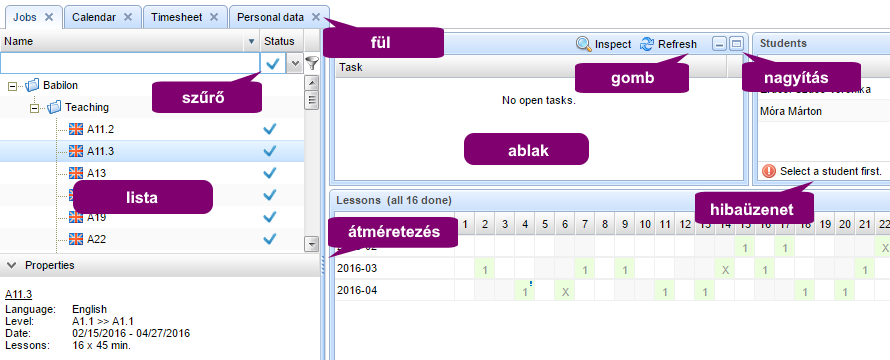
Tabs
On the left are the tabs located: jobs, calendar, timesheet, personal data, etc.
Tabs can be rearranged using drag-drop, closed and reopened with the plus button that is shown when not all tabs are open. Clicking on a tab will display the contents related to the tab. There may be sub-tabs on the right that further break down the content if it does not fit the screen.
The content is arranged logically from left to the right to the bottom: often there is a list on the left with related information shown in the windows on the right and below.
Many lists have CTRL+Click enabled, which moves to the related content on another tab (eg. clicking on the course list on the Students tab takes you the the courses list on the Courses tab).
List menu
Clicking on the  button in the header of lists displays a menu, which allows sorting and grouping of the data
 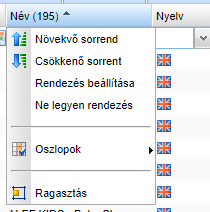 .
.
List row details
In some lists additional information related to a row can be displayed by clicking on  on the left side of the row.
Error messages
Error messages are indicated by an  exclamation mark, which you can drag the mouse over to display the complete error message.
Data export
Most tabs provide data export functionality. Click on the  export icon in the upper right corner to display the export menu. The data can be exported in CSV,
Forum and Help
Click on the icon in the upper right corner to access this help, or click on the  button next to it for the SchoolDrive forum.
en/intro/ui.1618824102.txt.gz · Last modified: 2021/04/19 11:21 by balazs